DIY Play Dough

I love being able to create materials for our play from scratch. With all the junky chemicals out there, I think it’s nice to know what my little people have in their hands (and sometimes mouths). This is a great basic recipe and can be customized by adding glitter for a little sparkle, sand for a different texture, or whatever else your imagination dreams up. The kiddos can help measure and mix, too, so it’s a fun project from the start to the finished product! We use natural food dyes for color. You could also add essential oils or even food extracts for a great scent.

What You Will Need
1 Cup All Purpose Flour
1/2 Cup Salt
1 Tbsp. Vegetable Oil
1 Tbsp. Cream of Tartar
1 Cup Water
Food coloring
Any add-ins of your choice (glitter, sand, etc.)

Mix up the dry ingredients in a saucepan (I use nonstick) add the wet ingredients and combine. Cook over medium-low heat, stirring constantly until it forms into a ball and is no longer wet. Remove from heat and dump the ball out onto the counter and knead for a couple of minutes (be careful, it will be hot!) Store in an airtight container!

Cheers!
-MC

9 Ideas Under $15 for a Candy-Free Valentine

If you’re like me, special treats don’t always mean SUGAR! Unfortunately, this time of year we are inundated with candy and sweets and told that chocolate is the way to show our affection. Those little bags of sweets are so tempting, convenient and inexpensive. Here are some alternatives for your little Valentines that are tried and true favorites in our house…all for under $15!

Toobs

20140202-164610.jpg
These come in just about any theme you could want. We use ours in our sensory bin, to make small worlds, in our “Busy Bins” (I will be posting about these soon) and as a take-along activity for restaurants or other quiet places where we might need a distraction.

Play Doh

20140202-165149.jpg
This is pretty self-explanatory. The multi-packs of small containers are always a hit.

Finger Lights

20140202-165535.jpg
These are a fun way of incorporating light into your play. We use them during night dance parties, during play inside of our tent and box cave, and they can make night-time car rides fun, too!

Paint Dabbers

20140202-165814.jpg
Good for art projects that aren’t too messy.

Wikki Sticks

20140202-171320.jpg
An open-ended toy that can be used to create in a variety of ways. A current favorite of F.

Bath Color Tablets

20140202-171429.jpg
Who doesn’t like colored baths? Also, a great way to learn color blending.

Color Paddles

20140202-171548.jpg
Can be used for digging in sensory bins, as sun catchers in a bright window, to get a different colored view of the world, or anything else their little imagination dreams.

Hog Wild Popper

20140202-171835.jpg
A novelty, the balls are soft foam, so while we are careful where we aim, there is a slim chance of injury from a stray shot. The adults enjoy this one, too!

Water Beads

20140202-172005.jpg
A sensory favorite! So much interesting texture, a ton of fun to squish, great for sensory bins!

Have fun looking for other ideas for your little sweethearts. Think outside the box (of chocolates)!
Cheers!
-MC

“Candy” Coated Cotton Balls

This is a project that F and I did a couple of weeks ago, but we are still having fun with the results. They are sort of open-ended, which we think are the best sort of playthings! We did this project before I started blogging, so pardon the quality and lack of pictures. When we do it again, I will update this post with more!

F was able to help with every aspect of this project, which always means that she will be more engaged in it than something that I set up for her. This was a good opportunity to talk about measuring and mixing in the kitchen, blending colors, and of course getting a little messy.

What You Will Need
Cotton balls
1 Cup All-Purpose Flour
1 Cup Water
Food coloring
Large mixing bowl
Bowls and spoons for dipping
Whisk
Baking sheet
Aluminum foil

Begin by preheating your oven to 300 degrees and lining a baking sheet with foil. Now comes all the kid-friendly steps. Mix up the flour and water until fully combined. F had a lot of fun stirring the goop around. Divide the mixture among the bowls, how many is up to you. It will depend on how many colors you will be making. We did 6: red, orange, yellow, green, blue, and purple. Add food coloring to the bowls and using a different spoon for each, mix them until the color is even. More food coloring means more brilliant colors, so don’t worry if little fingers squeeze more than a few drops of color into the bowls. Using the spoons (and fingers, of course) cover the cotton balls completely and set them on the baking sheet.

20140202-143714.jpg
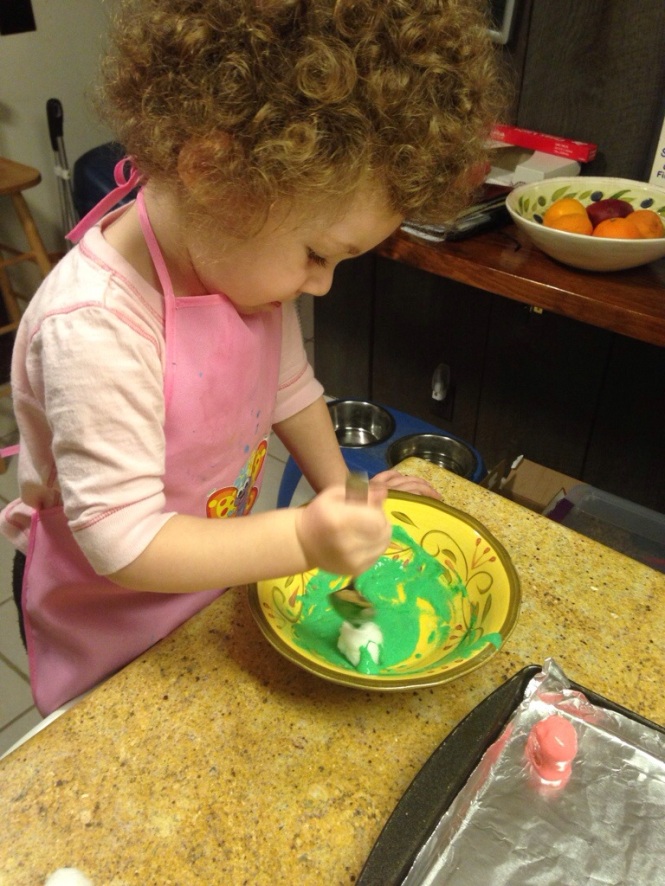
Using her favorite color

We made 25 cotton balls with this batch of colors.

20140202-144001.jpg
Getting them ready for the oven

Once we had all of them covered with the goop, we popped them in the oven for 45 minutes.

20140202-144121.jpg
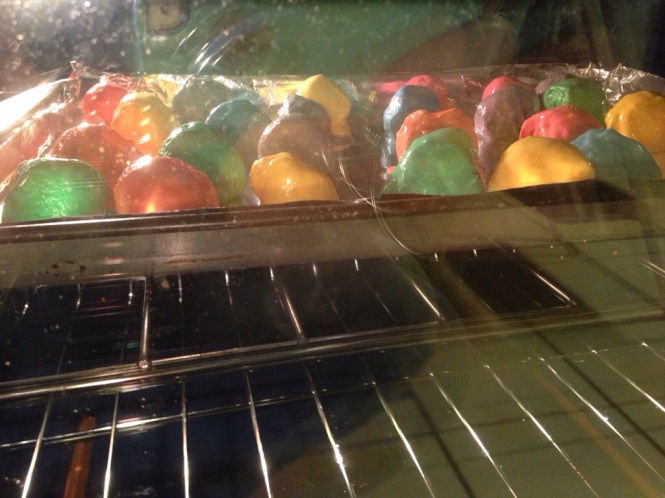
F had to keep checking on them to see if any changes were happening.

After the 45 minutes were up, we took them out and let them cool completely. F observed that the colors got darker and that they looked like candy now.
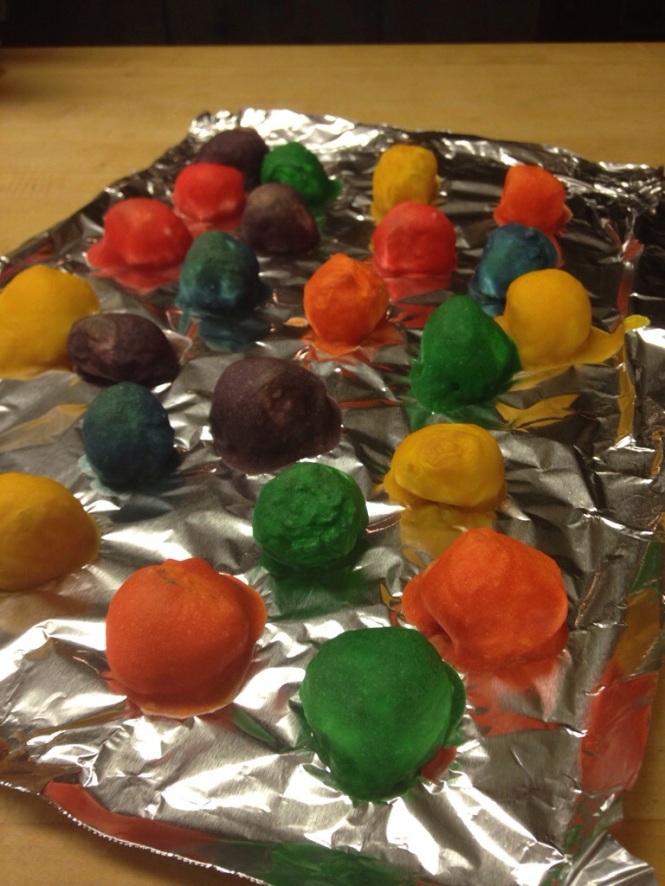
20140202-144318.jpg
Cooling down

Once they cooled, we peeled them off the foil and had fun sorting them into colors, putting them into containers to “sell” in our candy shop, and finally SMASHING them!

20140202-144500.jpg
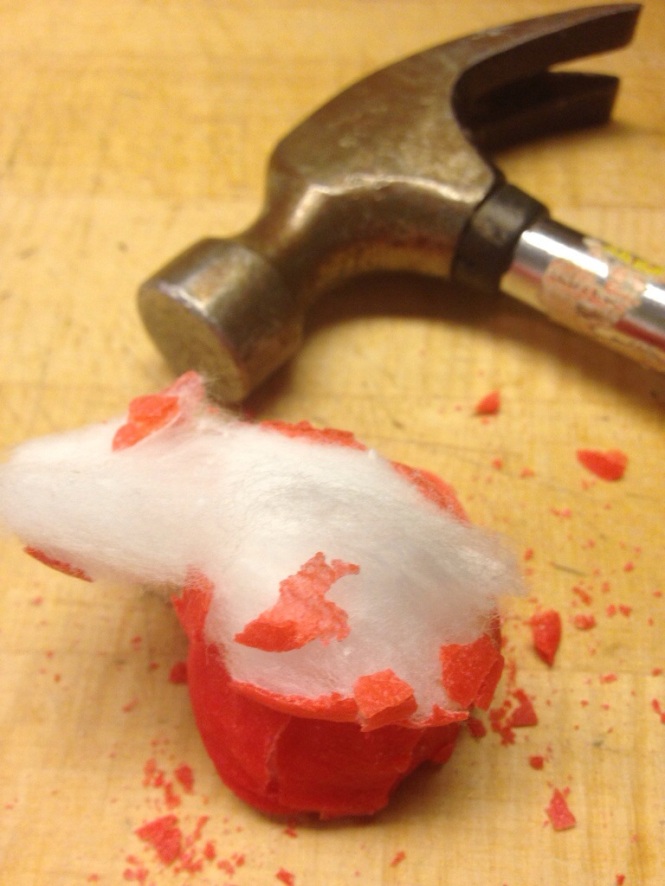
Crunchy outside, fluffy inside!

F loved using the real hammer and cracking them open to reveal the cotton ball inside. This was a good coordination activity, as the cotton balls tended to jump around a little bit as she pounded away at them.

We still have a few left in our Candy Shop, and she takes them out to play with and smash every few days. When they are gone, we will definitely be whipping up a new batch!

Cheers!
-MC

Homemade “Boogie Wipes”

So, if your house is like ours, this time of year is tough for little noses. The cold, dry air is causing plenty of “boogie” emergencies, and all the wiping is leaving skin raw. I discovered Boogie Wipes last cold season and loved the gentle saline that seemed to really help F want to blow her nose rather than run in fear of another tissue attack. What I wasn’t so crazy about was the cost. I set out to find an alternative, preferably one that I could make myself and that would be just as effective (and convenient) but also reusable. I recently discovered a fabulous blog that was just what I needed.

20140201-214039.jpg
What You Will Need
Cheap cotton receiving blankets (I bought a four pack of the Target brand in patterns that I liked and used them all to make 64 wipes. If you need fewer wipes, this recipe could be halved)
2 Cups Distilled water, warm
1 tsp. Sea salt
2 Tbsp. Aloe Vera (I used the gel)
4 Vitamin E capsules
8 Drops Lavender essential oil (Be sure that you use a quality essential oil)
4 tsp. Witch hazel
Plastic zipper bag / container with tight-fitting lid

I started by cutting up the receiving blankets, each blanket yielded 16 wipes. Then I set about making up the magic potion.
Warm the water up to just boiling to help dissolve the other ingredients. Then add the salt, aloe, the contents of the vitamin E capsules (not the capsules themselves, you will need to puncture them and squeeze out the goop), the lavender oil, and the witch hazel. Make sure to stir it well to fully combine everything.
Put the wipes into a zipper bag and pour the solution over them. Seal the bag and turn it over several times to saturate the cloth. I left mine overnight to let all the good stuff fully absorb.
Once they are fully saturated, fold them to fit whatever air-tight container you will be using to store them. They won’t be dripping wet, but just damp (think the same wetness as a baby wipe). If they are too wet, wring them out a bit before putting into your chosen container.

20140201-215842.jpg
I left my extras in the plastic bag to keep them moist and for quick and easy refilling of my to-go container of wipes. I happened to have a plastic container that works for me, but another good option for taking the wipes on the go would be a travel soap container with a hinged lid. Just make sure that whatever you choose seals so all that nose-pampering goodness doesn’t evaporate!
Once they are used, toss ’em in the wash (no fabric softener, though!) and mix up another batch.

20140201-220312.jpg
No more chasing down a munchkin with a runny nose, F willingly uses them. They smell great, look cute, keep my little people’s noses clean and free of raw skin, are reusable, and inexpensive to make! They meet all of my criteria!

20140201-220551.jpg
Give them a try!
Cheers!
-MC

Snow Graffiti

20140201-153339.jpg

20140201-150309.jpg

Since it is the first day that we’ve had in a while that the temperature cooperated enough to get outside (you know that it has been cold when 34 feels like a heat wave) we combined our outdoor play with some art today. F was really into this project and it kept her engaged for well over an hour. She “wrote” on the snow, we made shapes, and colored larger areas for stomping. After J finished stacking our newest load of firewood, he joined us and built a snowman for F to color, which was a fun 3D art project. Unfortunately, I didn’t get pictures of that because M was cold and she and I ended up back in the house before the masterpiece was completed.

20140201-150322.jpg
Carefully choosing her colors

Our whole yard was a canvas, and luckily, Mother Nature will take care of the cleanup!

20140201-150528.jpg
The artist herself

I found the spray bottles at the dollar store and used water and a liberal amount of food coloring for our “paint”.

20140201-150603.jpg

20140201-150535.jpgAdding more color
Colorful fun in the snow!
Cheers!
-MC